How to Make Fabric Labels
A lot of people ask me how to do this, and it's all in the instructions on the back of the package but I've been wanting to make a tutorial so here we go.
How to Make Fabric Labels
These are perfect for little projects that you want to put your logo on, or names, whatever.
All you need is:
- Colorfast Sew-in Inkjet Fabric Sheets (white, NOT cream)
- Inkjet Printer
- Preferably Microsoft Word (or any software you can arrange graphics)
- Iron
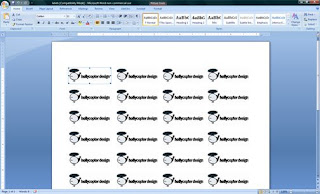
1. In Microsoft Word (or any software where you can arrange graphics, like Publisher) create a new document and place as many of your labels as you can keeping them the same size, or different sizes if you like. Make sure the Text Wrapping is on through so you can place them close together. You can do this by going to Format>Text Wrapping>Through. You can make several sizes for different projects. If you want to make bags with pictures of your dog or kids you can do this same process. I created my own logo in Photoshop and then brought it into Word, but you can make a logo with just text or whatever you like.

2. Print the labels using the fabric sheets as you would normal paper. You can buy the paper at any fabric store, I got mine at Hancock. I haven't checked, but they might have it at Walmart. I tried the cream color of this same fabric sheet and it's a lot less firm and the colors aren't as bright. The white is much sturdier like cardstock and the colors are prettier. It also doesn't fray, which the cream does.


3. Remove the back and iron on high heat.
I kept trying to rotate the picture...eh. Anyway, Sewing it in left these massive holes, I'll have to keep working with that but have fun with your new labels!


0 Comments:
Post a Comment
Subscribe to Post Comments [Atom]
<< Home